Building Dynamic Game Worlds: Creating a Procedural Maze Generator in Unity
There's something magical about procedural generation. I still remember the first time I played Minecraft and realized that the entire world was created on the fly—unique, vast, and full of possibilities. That sense of wonder stuck with me, and it's what drove me to dive into procedural content generation for my own games.
Today I want to share my journey creating a robust procedural maze generator for Unity that's become the backbone of several of my projects. Whether you're building a horror game, a puzzle platformer, or just experimenting with procedural generation, I hope you'll find this insight into my process valuable.
The Magic of Procedural Mazes
I've always been fascinated by mazes. As a kid, I'd spend hours with those maze booklets, pencil in hand, trying to find the one true path. Years later, when I started game development, I realized that creating those labyrinths could be just as fun as solving them.
The real power of procedural generation isn't just saving time on level design (though that's a nice bonus). It's about creating unique experiences every time someone plays your game. It's about surprising even yourself as the developer.
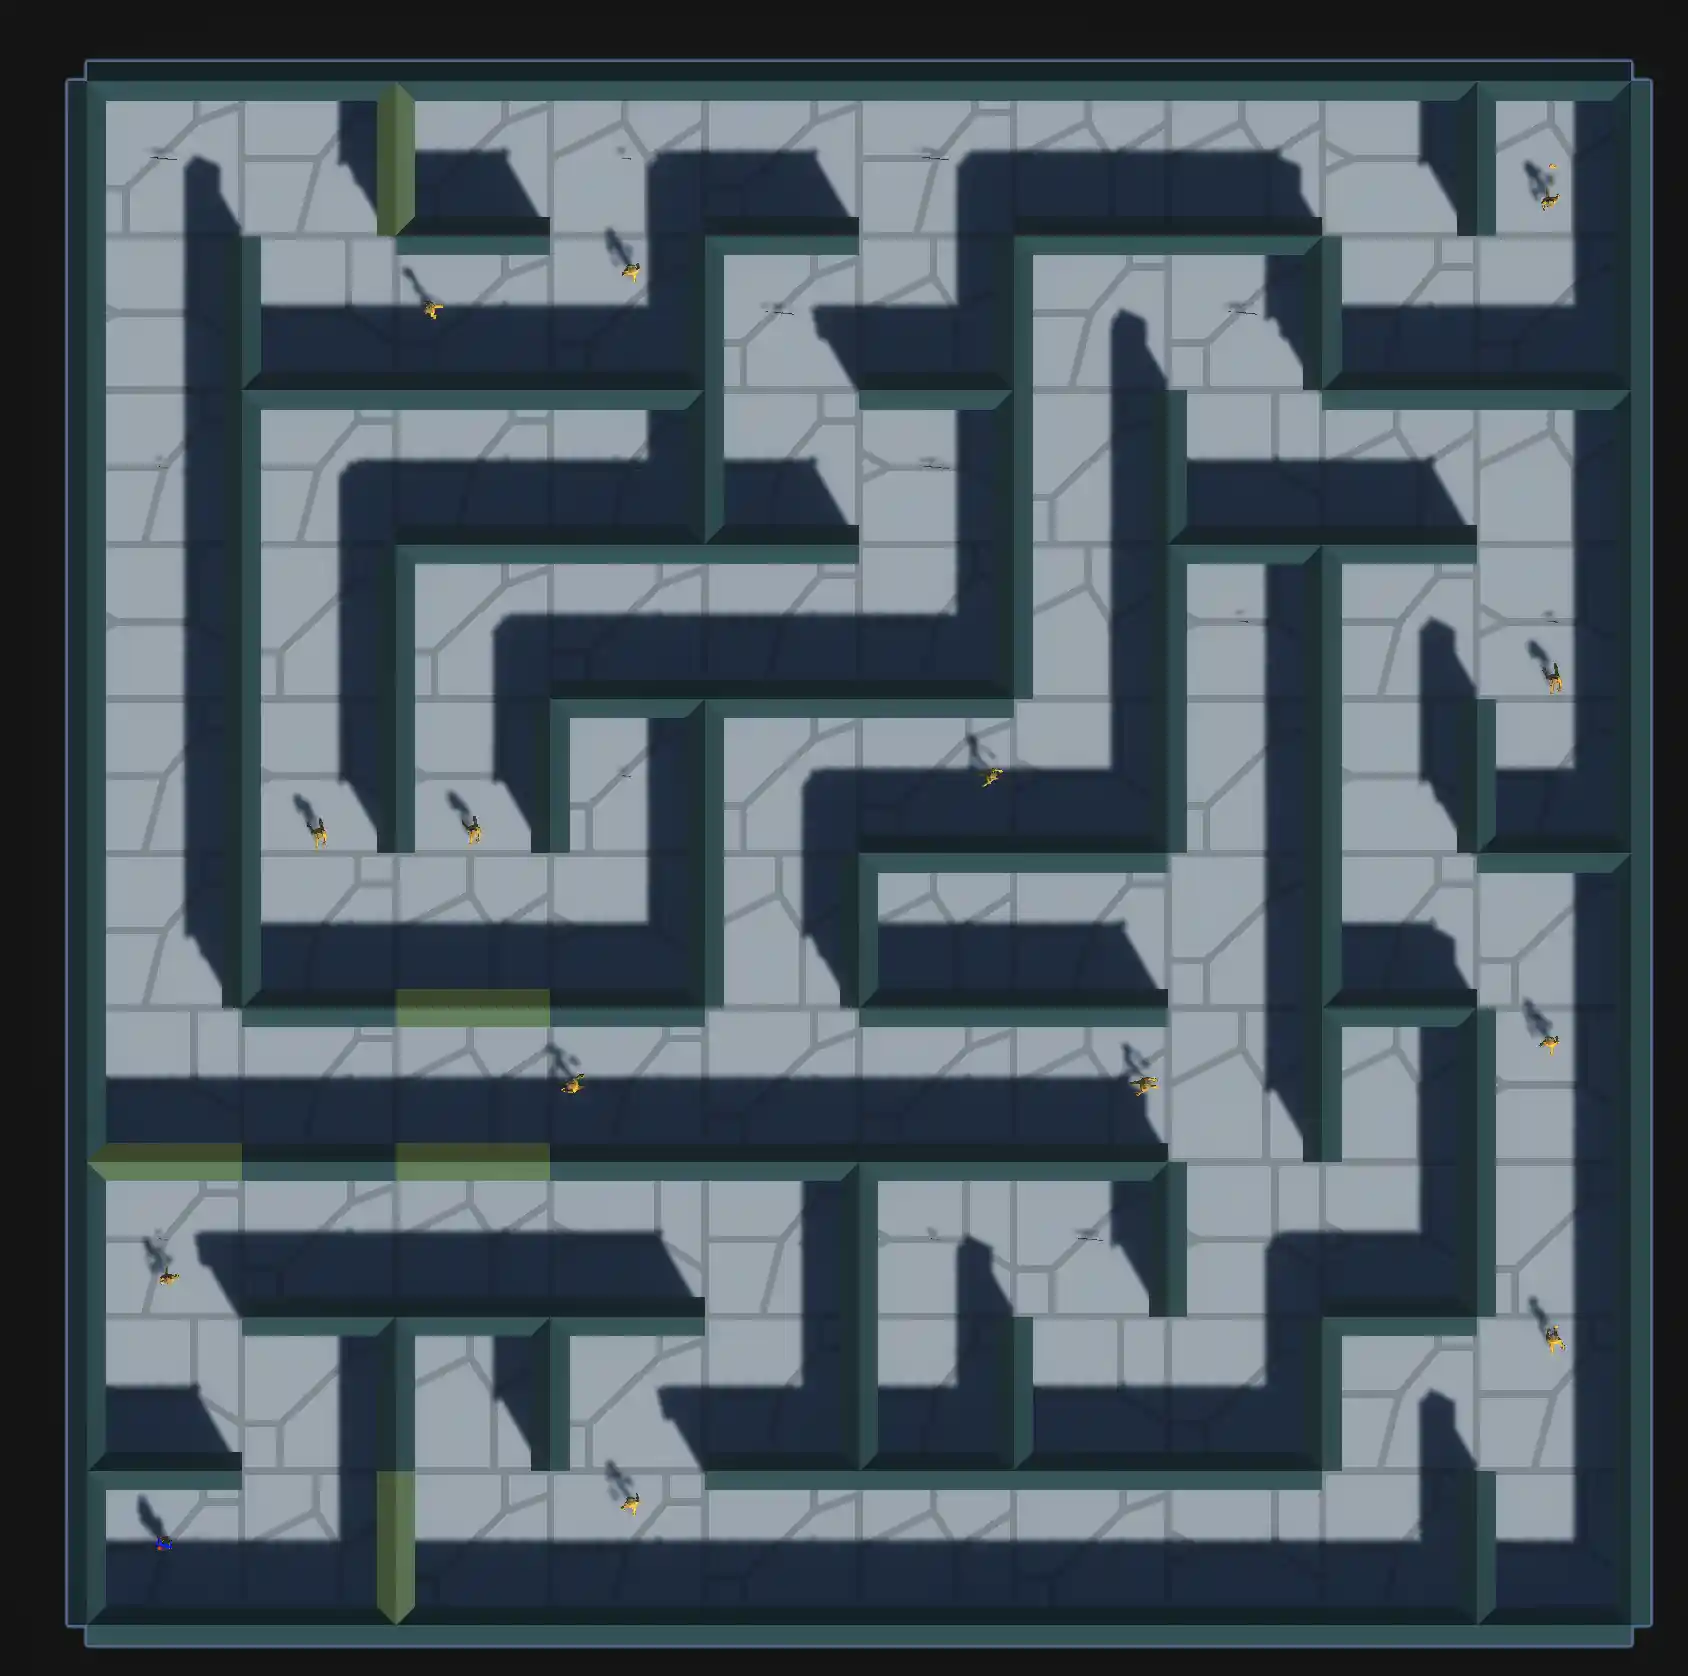
The Algorithm: Depth-First Search with a Twist
After experimenting with several algorithms, I settled on a modified depth-first search approach. It's relatively simple to implement but creates those winding, interesting paths that make for compelling gameplay.
Here's the core of how it works:
- Start with a grid where all cells are surrounded by walls
- Pick a random starting cell, mark it as visited
- While there are unvisited cells:
- If the current cell has unvisited neighbors:
- Pick a random unvisited neighbor
- Remove the wall between the current cell and the chosen neighbor
- Move to the chosen neighbor and mark it as visited
- Else, backtrack to the previous cell
- If the current cell has unvisited neighbors:
This is what the core generation function looks like in practice:
private void GenerateMaze()
{
    maze = new MazeCell[width, height];
    // Initialize each cell in the maze
    for (int x = 0; x < width; x++)
        for (int y = 0; y < height; y++)
            maze[x, y] = new MazeCell();

    Stack<Vector2Int> stack = new Stack<Vector2Int>();
    Vector2Int current = new Vector2Int(0, 0);
    maze[0, 0].visited = true;

    // DFS loop: visit unvisited neighbors and remove walls accordingly
    do
    {
        List<Vector2Int> unvisitedNeighbours = new List<Vector2Int>();

        // Check North, South, East, West for unvisited neighbors
        // [Code for checking each direction omitted for brevity]

        if (unvisitedNeighbours.Count > 0)
        {
            // Choose a random unvisited neighbor
            Vector2Int chosen = unvisitedNeighbours[Random.Range(0, unvisitedNeighbours.Count)];
            stack.Push(current);
            RemoveWall(current, chosen);  // Remove the wall between current and chosen cell
            maze[chosen.x, chosen.y].visited = true;
            current = chosen;
        }
        else if (stack.Count > 0)
        {
            // Backtrack if no unvisited neighbors
            current = stack.Pop();
        }
    } while (stack.Count > 0);
}
What I love about this approach is how simple the core algorithm is, but how complex and varied the results can be. Each maze feels unique, with its own character and flow.
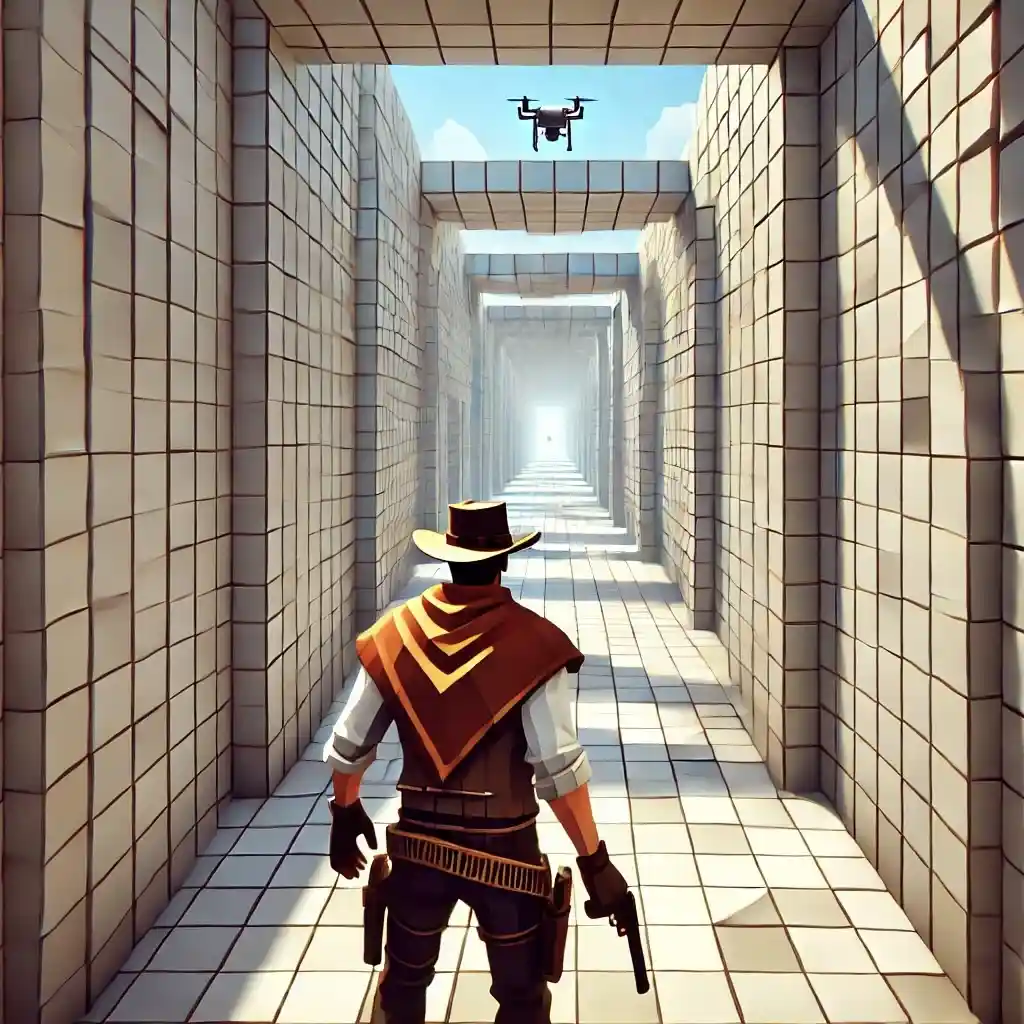
Beyond Basic Mazes: Adding Game Elements
A bare maze isn't necessarily fun to play. The real challenge came in turning these procedural structures into compelling game environments. I wanted to create something that could be dropped into different types of games and immediately add value.
Breakable Walls
One of my favorite features is the breakable walls system. I wanted some walls that players could destroy, creating their own paths through the maze. But I didn't want these to be random—they needed to make sense architecturally.
I created a special algorithm to detect wall configurations and prevent breakable walls from appearing in L-shaped or T-shaped junctions:
private bool IsWallPartOfLOrTShape(int x, int y, string wallDirection)
{
    // Skip check for outer walls - they can't be breakable anyway
    if (x == 0 || y == 0 || x == width - 1 || y == height - 1)
        return false;

    MazeCell cell = maze[x, y];

    // For a North wall, check if it forms an L-shape with East or West walls
    if (wallDirection == "North" &&
        ((cell.hasNorthWall && cell.hasEastWall) ||
         (cell.hasNorthWall && cell.hasWestWall)))
        return true;

    // Similar checks for other directions...

    return false;
}
I remember the moment this clicked into place—I was testing a build and realized that breakable walls at corners looked completely wrong. They broke the visual language of the maze. After implementing this check, the mazes instantly felt more cohesive and intentional.
Enemy Patrol Paths
Another challenge was creating sensible patrol paths for enemies. I didn't want them walking into walls or getting stuck in dead ends.
My solution was to generate two types of paths—straight lines ("I" shaped) and corners ("L" shaped)—that followed the open corridors of the maze:
private List<Vector2Int> GenerateIStraightPath(Vector2Int start)
{
    List<Vector2Int> path = new List<Vector2Int> { start };

    // Find valid directions where there's no wall
    List<Vector2Int> validDirs = new List<Vector2Int>();
    // [Code to find valid directions omitted]

    if (validDirs.Count == 0)
        return null;

    Vector2Int dir = validDirs[Random.Range(0, validDirs.Count)];
    Vector2Int current = start;

    // Extend the path in the chosen direction as far as possible
    while (/* can continue extending */)
    {
        Vector2Int next = current + dir;
        if (!IsPathClear(current, next) || usedPathCells.Contains(next))
            break;

        path.Add(next);
        current = next;
    }

    return (path.Count >= 3) ? path : null;
}
This was one of those features that took several iterations to get right. I spent a whole weekend watching AI entities bump into walls before I refined the path generation. But the first time I saw enemies smoothly patrolling through the maze, I knew it was worth the effort.
Collectibles and Decorations
The final touch was adding collectibles and decorations to make the maze feel alive and give players goals beyond simple navigation:
if (collectiblePrefabs != null && collectiblePrefabs.Count > 0 && Random.value < collectibleSpawnChance)
{
    GameObject collectibleToSpawn = collectiblePrefabs[Random.Range(0, collectiblePrefabs.Count)];
    Vector3 collectiblePos = cellCenter + new Vector3(0, 0.5f, 0);
    GameObject collectible = Instantiate(collectibleToSpawn, collectiblePos, Quaternion.identity, transform);
    // [More setup code]
    collectibleInCell[x, y] = true; // Mark cell as having a collectible
}
I tried to be smart about decoration placement too. Decorations are placed near walls rather than in the middle of corridors, which both looks more natural and keeps pathways clear for gameplay.
Challenges and Solutions: Lessons From the Trenches
This project wasn't without its hurdles. Here are some of the biggest challenges I faced and how I solved them:
The Corner Problem
One of the most frustrating bugs happened with L-shaped enemy paths. Enemies would sometimes cut corners instead of following the exact path, which looked terrible and broke immersion.
The solution was deceptively simple: when creating patrol points for the enemy, I made sure to explicitly include the corner point in their path:
var pointCount = Mathf.Min(path.Count, 3); // 2 - line, 3 - corner
var patrolPoints = new Transform[pointCount];

for (var i = 0; i < pointCount; i++)
{
    var pointObj = new GameObject($"PatrolPoint_{enemyInstance.name}_{i+1}")
    {
        transform =
        {
            position = path[i],
            parent = transform // Parent to the MapGenerator
        }
    };

    patrolPoints[i] = pointObj.transform;
}
This seemingly small change made enemy movement look much more natural. It's these little details that separate a good procedural system from a great one.
Performance Optimization
When I first implemented the system, I encountered serious performance issues with larger mazes. Instantiating hundreds of wall objects caused noticeable frame drops, especially on mobile devices.
I tackled this by combining several techniques:
- Cell-based culling for objects far from the player
- Optimizing prefabs to reduce polygon count
- Batching similar objects together
For particularly large mazes (over 30x30), I implemented a chunking system that only generates and renders portions of the maze around the player—similar to how Minecraft handles its world.
Making It Your Own: Customization Tips
The best part about my maze generator is how customizable it is. Here are some ways you can adapt it for your specific game:
Theming Your Maze
I designed the TerrainAssets class to make theming super flexible:
[System.Serializable]
public class TerrainAssets
{
    public List<GameObject> floorPrefabs;
    public List<GameObject> northWallPrefabs;
    public List<GameObject> southWallPrefabs;
    public List<GameObject> eastWallPrefabs;
    public List<GameObject> westWallPrefabs;
    public List<GameObject> decorationPrefabs;
}
This allows you to swap between completely different visual styles—I've used it for everything from ancient stone labyrinths to sci-fi corridors to overgrown gardens. The system randomly selects from available prefabs within a theme, creating visual variation even with a small set of assets.
Customizing Generation Parameters
Another aspect I love is how tweaking a few parameters can dramatically change the feel of your mazes:
// More linear, straightforward mazes
width = 20;
height = 10;
breakableWallChance = 0.1f;
enemyPathSpawnChance = 0.05f;

// More complex, challenging mazes
width = 15;
height = 15;
breakableWallChance = 0.3f;
enemyPathSpawnChance = 0.15f;
I've found that square mazes (equal width and height) tend to feel more confusing and maze-like, while rectangular ones often create more directed experiences—perfect for guiding players toward objectives.
Where To Go From Here
The beauty of procedural generation is that there's always room to grow. Here are some directions I'm exploring for the future:
- Multi-level mazes connected by stairs or teleporters
- Environmental hazards like trap tiles or moving obstacles
- Biome-based generation with different rules for different areas
- Quest integration that creates mazes specifically designed for certain objectives
I've been experimenting with machine learning to analyze player behavior and adapt maze difficulty on the fly—imagine a maze that learns what challenges you find most engaging and generates more of those!
Closing Thoughts
Creating this maze generator has been one of the most rewarding projects in my game development journey. There's something deeply satisfying about creating a system that can surprise even you, its creator.
If you're new to procedural generation, don't be intimidated. Start simple, iterate often, and play with your creations. Some of the best features of my system came from just experimenting and seeing what happened.
And remember: the goal isn't perfection. It's creating experiences that feel alive, surprising, and fun to explore. Even the "bugs" sometimes lead to the most interesting gameplay moments!
I hope this look into my process inspires you to try procedural generation in your own projects. If you do use this maze generator or build something similar, I'd love to see what you create with it!
Have you experimented with procedural generation in your games? What challenges did you face? Let me know in the comments below!
Related Articles